 how-to
How to Prepare for Invisalign: A Complete Guide
Table of Contents
- What to Expect at Your Invisalign Consultation
- How to Prepare for Invisalign Before Day One
- Invisalign First Week Tips: Managing Discomfort and Adjusting
- How to Clean Invisalign Aligners Properly
- Daily Habits That Determine Your Invisalign Results
- Psychological Prep, Travel Kits, and Post-Treatment Planning
- Prepare for Invisalign: Your Pre-Start Checklist
- Conclusion
Last Updated: August 19, 2026
Getting ready for Invisalign is more than just showing up to your first appointment. At ALLDENT Family Dental, we've guided many patients through this process, and the ones who prepare properly tend to have a smoother experience, fewer surprises, and better results. This guide covers how to prepare for Invisalign from your consultation through the habits that define your outcome, including the psychological side, travel readiness, and what happens after treatment ends.
The core truth about Invisalign is this: the aligner system itself is straightforward. What separates success from frustration is patient compliance and preparation.
What to Expect at Your Invisalign Consultation
Your Invisalign consultation is a diagnostic appointment where your provider determines whether clear aligner treatment is right for your specific malocclusion, crowding, or alignment issues. Come prepared with your dental history and any recent X-rays. Your provider will review your oral health status first, because orthodontic treatment cannot begin if there are untreated cavities, gum disease, or other active dental concerns.
Digital Scans, X-Rays, and Dental Records
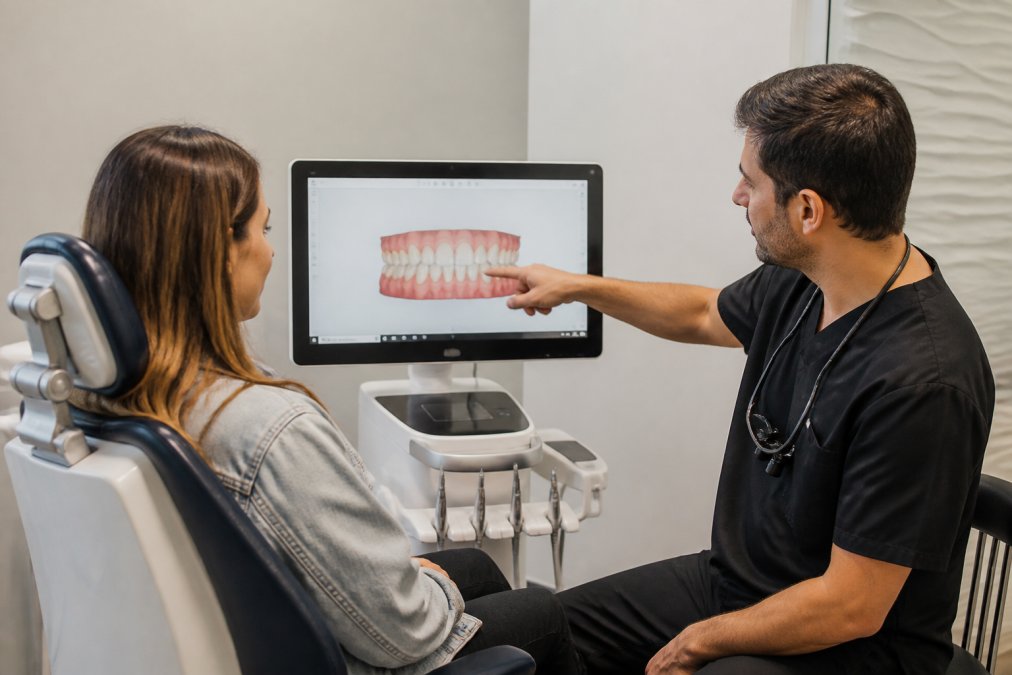
Clinical data collection typically includes dental records review, X-rays, and a digital scan of your teeth using an iTero scanner or similar intraoral imaging device. This creates a precise 3D model of your teeth, replacing old putty impressions and producing more accurate data.
The 3D scan is the foundation of your entire treatment plan, capturing the exact position, angulation, and spacing of every tooth. X-rays add information about root positions and bone structure. Bring any orthodontic records from previous treatment if applicable, as prior history affects how teeth move and what's achievable.
Understanding Your Treatment Plan and Attachments
Your treatment plan will show a digital simulation of how your teeth are expected to move tray by tray. Pay close attention and ask how many trays are in your plan, how frequently you'll switch trays, and the projected overall treatment length.
Attachments are small tooth-colored buttons bonded to specific teeth to give aligners more grip and directional control. Ask upfront whether your plan includes them, as they affect how your aligners feel and visibility. Also ask about interproximal reduction, where small amounts of enamel are removed between teeth to create space for movement.
How to Prepare for Invisalign Before Day One
How you prepare in the days before your first tray determines how smoothly that first week goes.
Essential Supplies to Have Ready
Stock up on these before your aligners arrive:
- Aligner case: You'll remove trays every time you eat or drink anything other than water. Without a case, they end up in a napkin and get thrown out.
- Soft-bristled toothbrush: You'll be brushing after every meal. A soft brush protects enamel under the added stress of frequent cleaning.
- Fluoride toothpaste and floss: Plaque buildup under aligners accelerates cavity formation.
- Dental wax: Useful in the first week if edges feel sharp.
- Over-the-counter pain relief: Ibuprofen or acetaminophen for the first few days of each new tray.
- Chewing exercises tool (chewies): Small cylindrical foam pieces that help seat aligners fully against teeth.
- Retainer cleaning tablets: For weekly deep cleaning of trays.
| Supply | Purpose | Priority |
|---|---|---|
| Aligner case | Prevents loss when eating out | Essential |
| Soft toothbrush | Protects enamel with frequent brushing | Essential |
| Fluoride toothpaste | Prevents cavities under trays | Essential |
| Dental wax | Soothes irritation in first week | High |
| Chewies | Seats aligners fully against teeth | High |
| OTC pain relief | Manages tray-change discomfort | High |
| Retainer cleaning tablets | Weekly deep cleaning | Moderate |
Financial and Insurance Preparation
Invisalign costs vary based on treatment complexity, the number of trays required, and your provider's location and experience. Get a written treatment estimate from your provider before committing.
Check your dental insurance plan carefully. Many plans that cover orthodontic treatment include Invisalign, but coverage amounts, lifetime maximums, and age restrictions vary significantly. According to the Canadian Dental Association's patient resources, patients should review their benefit plans and ask their dental office to submit a predetermination to the insurer before treatment begins.
Also ask your provider about payment plans. Many dental offices offer in-house financing options that spread the cost over the treatment period.
Invisalign First Week Tips: Managing Discomfort and Adjusting
The first week is the hardest part of the entire treatment. Discomfort during the Invisalign first week is normal and expected. Your teeth are under new pressure, your mouth isn't used to the plastic, and your tongue is adjusting. Most patients find days two and three are the most uncomfortable, with noticeable improvement by day five or six.
Speech Adjustment and Wearing Your Aligners
Clear aligners affect speech temporarily. You'll likely notice a slight lisp or altered "s" and "th" sounds in the first few days. This resolves quickly for most people, typically within a week. The fastest way to accelerate adjustment is to talk more, not less. Read aloud, make phone calls, have conversations.
Wear time is non-negotiable. Aligners must be worn 20 to 22 hours per day for treatment to track correctly. According to Invisalign's clinical guidance on wear time compliance, consistent daily wear is the single most important factor in achieving your planned outcome.
Dietary Adjustments and Protecting Your Enamel
Remove aligners before eating or drinking anything other than plain water. Hot drinks warp the plastic. Sugary or acidic drinks trapped under aligners accelerate enamel erosion and plaque buildup.
Many patients find it easier to structure their day around two or three defined meal periods rather than constant snacking. Every snack requires removal, cleaning, and reinsertion, which eats into your wear time. Reducing snacking frequency is one of the most underrated Invisalign first week tips.
Chewing exercises with chewies after inserting each tray help seat the aligners properly against your teeth. Spend two to three minutes biting down on them after every insertion.
How to Clean Invisalign Aligners Properly
Cleaning Invisalign aligners properly is one of the most important habits you'll build during treatment. Neglect this, and you're creating a warm, moist environment against your teeth for 20+ hours a day, leading to plaque buildup, bad breath, and elevated cavity risk.
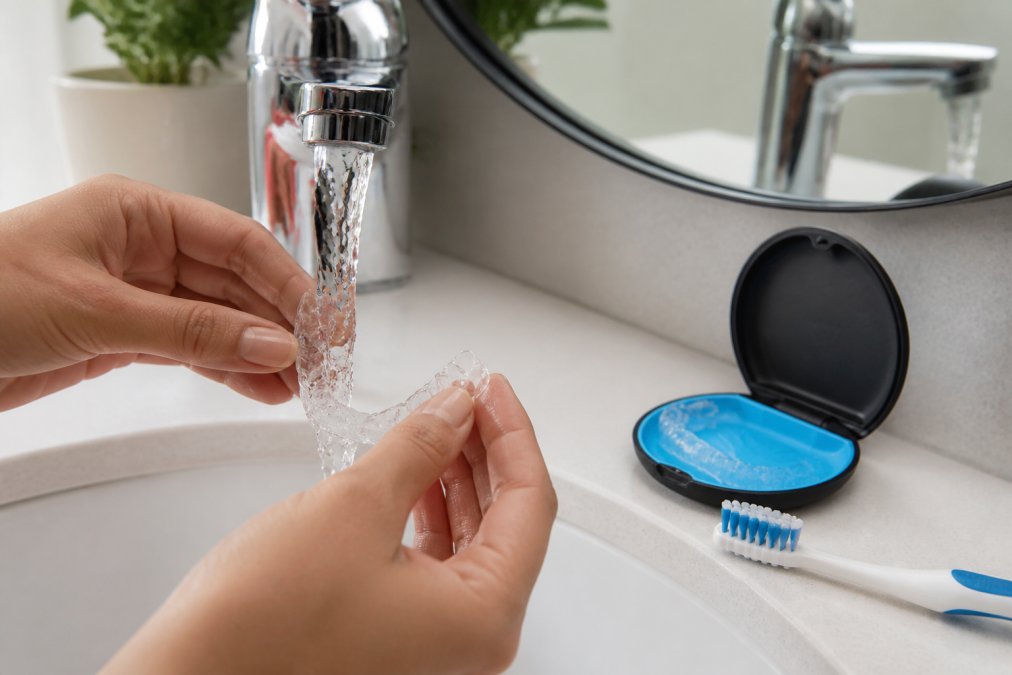
The daily cleaning routine is straightforward:
- Rinse aligners under lukewarm water every time you remove them. Never hot water, which warps the plastic.
- Brush aligners gently with a soft toothbrush and clear, unscented soap. Avoid toothpaste, which scratches the surface.
- Rinse thoroughly before reinserting.
- Once a day, soak trays in a retainer cleaning solution or diluted white vinegar for 15 to 20 minutes to remove mineral deposits.
Never leave aligners exposed to air for extended periods without rinsing them first.
Daily Habits That Determine Your Invisalign Results
Invisalign doesn't straighten your teeth. Your compliance does. The aligner system is a tool. Its effectiveness is entirely dependent on how consistently and correctly you use it.
Wear Time Compliance and Tracking Progress
Track your wear time using a phone timer or dedicated app. The goal is 20 to 22 hours daily, every day. Switch trays on the schedule your provider sets, typically every one to two weeks. Some providers recommend switching at night so you sleep through the initial pressure of a new tray.
Attend every scheduled check-in appointment. Your provider monitors how your teeth are tracking against the digital plan. If teeth aren't moving as expected, refinements can be ordered before the problem compounds.
Oral Hygiene Routine During Treatment
Your oral hygiene routine needs to become more rigorous during orthodontic treatment. Brush after every meal before reinserting aligners. Floss at least once daily. Use a fluoride mouthwash if your provider recommends it.
According to the Canadian Dental Hygienists Association's oral health guidelines, consistent plaque removal is critical when teeth are under orthodontic pressure. If you notice unusual sensitivity, gum swelling, or discomfort that doesn't resolve within a few days of a tray change, contact your provider.
Psychological Prep, Travel Kits, and Post-Treatment Planning
Psychological preparation matters more than most people admit. Invisalign is a long-term commitment, often 12 to 24 months. There will be weeks where you're frustrated or tired of the routine. Knowing this in advance and deciding how you'll handle it is a form of preparation. Some patients find it helpful to take photos at the start of each month to see incremental progress. Others set milestone rewards for themselves.
Travel kits are essential if you travel for work or leisure. Pack a dedicated Invisalign travel kit that includes:
- Spare aligner case
- Travel toothbrush and clear soap
- Dental floss
- Chewies
- Pain relief tablets
- Your current and next set of trays (in case of delays)
Always carry your aligners in your carry-on luggage when flying, never in checked bags.
Financial prep should include planning for retainers. Retainers are not optional after Invisalign. Most patients wear retainers nightly long-term. Factor this into your overall budget and ask your provider upfront what the retention phase involves.
Post-treatment maintenance means continuing the oral hygiene habits you built during treatment. The discipline of brushing after meals and flossing daily shouldn't stop when the aligners do.
Prepare for Invisalign: Your Pre-Start Checklist
Use this checklist to confirm you're ready before your first tray goes in:
- Consultation completed and treatment plan reviewed in full
- X-rays and 3D scan on file with your provider
- Questions about attachments and interproximal reduction answered
- Insurance predetermination submitted and confirmed in writing
- Payment plan or financing confirmed if needed
- Aligner case purchased
- Soft toothbrush and fluoride toothpaste stocked
- Chewies and dental wax on hand
- OTC pain relief available for first tray change
- Retainer cleaning tablets purchased
- Meal timing strategy decided (reduced snacking plan)
- Travel kit assembled if applicable
- Wear time tracking method chosen
- Retainer phase discussed and budgeted for
- Follow-up appointment schedule confirmed
The ALLDENT Family Dental team, led by Dr. Rami Gilada, uses modern digital imaging technology to build personalized Invisalign treatment plans for each patient. If you have questions about any step on this list, bring them to your consultation.
For additional guidance on orthodontic treatment readiness, the Canadian Association of Orthodontists patient information resources offers detailed overviews of what to expect from clear aligner therapy.
Starting Invisalign without preparation is one of the most common reasons patients struggle with compliance and results. The routine adjustments, the cleaning habits, the wear time discipline, and the financial planning all need to be in place before day one. ALLDENT Family Dental offers personalized treatment plans, advanced digital scanning technology, and a patient-centered approach that makes the preparation process clear and manageable. Book an appointment with our team to get your questions answered and your treatment plan started on the right foundation.
Frequently Asked Questions
What is the 30-minute rule with Invisalign?
The 30-minute rule means you should wait at least 30 minutes after eating or drinking anything acidic or sugary before reinserting your aligners. This gives your saliva time to neutralize acids and reduce the risk of trapping them against your enamel. Rinsing your mouth with water and brushing your teeth before putting the trays back in is the best practice to protect against cavities and staining during orthodontic treatment.
What should I know before starting Invisalign treatment?
Before starting Invisalign, confirm your dental hygiene is in good shape, any cavities or gum issues should be treated first. Understand that aligners must be worn 20 to 22 hours per day for the treatment plan to stay on track. Budget for retainers after treatment ends, since post-treatment maintenance is essential for lasting alignment. Review your dental insurance benefits and ask your provider about financing options to avoid surprises.
How do I survive the first week of Invisalign?
The first week is typically the hardest. Expect pressure and mild discomfort as your teeth begin to shift, over-the-counter pain relief can help. Chewing exercises using orthodontist-recommended chewies help seat the aligners properly. Stock up on a travel toothbrush, dental case, and lip balm. Speech may feel slightly different at first, but most people adjust within a few days. Staying consistent with wear time from day one sets the tone for the entire treatment.
How do I prepare for my first Invisalign consultation?
Bring any recent dental X-rays or records to your consultation if you have them. Be ready to discuss your oral health history, including past orthodontic treatment or crowding concerns. The appointment typically includes a 3D digital scan using an iTero scanner to map your teeth precisely. Write down any questions about wear time, attachments, interproximal reduction, or cost ahead of time so you leave with a clear picture of your full treatment plan.
This article was written using GrandRanker